Top Social

Twirls and Swirls Nail Art - Lina Nail Art and Moonflower Polish

Wednesday, November 1, 2017
moonflower-polish-noche-lina-nail-art-twirls-swirls-stamping

Hey there! Long time no see. No seriously, I have like quite a few things to blog about, but then instead of editing videos or photos or even painting my nails, I've been binge watching Stranger Things. Cause believe it or not, I hadn't watched Season 1 in it's entirety. My hubs has this annoying tendency to keep watching series without me, after I take the kids to my room for bedtime stories and nighttime cuddles and whatnot, which always takes too long and I end up falling asleep. The result is that he keeps on watching episodes unless I specifically tell him not to. And the other thing is that I tend to avoid things when they are super hyped up. Like it seemed interesting but I thought it was going to be more "horror" and less "sci-fi" so I didn't pay attention. And then it blew it up and everyone was watching so I felt like I had to resist it. But then the hubs watched Season 2 last weekend and I caught the 1st few episodes and the last 3 and I was like...I *have* to watch this now. So I went back and watched Season 1 and now I'm almost done with Season 2, and that's been my week so far. Totally irresponsible, housework ignored, polish making business placed aside, nails unpainted, press samples and stuff bought with blogger discounts just collecting dust on my desk.... tsk tsk. But it's sooo good you guys, so good. Like, the type of story I just absolutely love. I get it now, I get the hype.

Anyway, on to nails! I recently purchased the Lina Nail Art Twirls and Swirls 01 plate* and I've been wanting to take it on a test run. So here's what I came up with..or rather, there it is above. Guys...I have to be honest, it's a bit tricky to use. At least for me. This isn't really a full on plate review, no pics or swatches here but here's my experience with it. First off, I don't like clear stampers, I have trouble getting them to work and I feel they are so finicky with the polishes they will work with. This plate for the most part has to be used with a clear stamper because it's all about layers. You have a bunch of wonderful negative/blank spaced images and these super cool twirly arabesque vines and leaves and twirly swirly images to layer over them. And I suck at it. It took me all day to do these nails, I was so frustrated.

moonflower-polish-bronze-lina-nail-art-twirls-swirls-stamping

The concept is simple, you use the negative blank space on one side of the image with one color, stamp that on your nail, then use the corresponding swirly part with another color and layer that on top or on the edge of the part you stamped 1st. Did that make sense? So for my mani here I started with a base of Renaissance Cosmetics Blood Lust (sadly no longer in business) and then stamped the blank/negative spaced image in black (Moonflower Polish Noche). Got that part down. But for the life of me I couldn't line up the swirly wines properly over the black on my nails. I couldn't figure out how to align them, did they go over the black, over the red, along the edge? After multiple failures, I wiped the stamping off, redid my base and settled on doing decals. And that finally worked, stamping the black on the mat, allowed me to clearly see how I wanted to align the vines over it. For this image, the vines looked best right over the edge between the red and black.

moonflower-polish-noche-bronze-lina-nail-art-twirls-swirls-stamping-macro

It was so hard to do you guys...like way harder than it needed to be. I would have done a video but by then end I was just to annoyed at it. Like I seriously thought I would have to sell the plate cause I would have no use for it. I am super glad I got it to work.

Products used:
Base polish: Renaissance Cosmetics Blood Lust
Stamping Polish: Moonflower Polish Noche and Bronze
Stamping Plate: Lina Nail Art Supplies Twirls and Swirls 01
Stamper: Eujibas Clear Stamper
Top Coat: INM Out the Door

Twirls and Swirls 01 was purchased with a blogger discount from Lantern and Wren. Use my link here for a 10% discount on your purchase, only for 1st time buyers, discount applied at checkout. Moonflower Polish is my own brand of 5 free handcrafted nail polish for stamping, nail art, and regular wear, available at www.moonflowerpolish.com and www.nail-artisan.co.uk. Noche is also available at Lantern and Wren. 

If you made it all the way to the end, tell me...do you have this plate? Did you find it hard or easy to use? Let me know in the comments!

INM Glow in the Dark Nail Polishes

Thursday, October 19, 2017
inm-glow-in-the-dark-collection-swatch-review

*Press Samples* Hey everybody! Guys...it's been a while hasn't it? I keep doing this. I don't mean to, I have every intention to keep blogging, I have loads of polishes to swatch and tons of nail art ideas and tutorials, what I'm lacking is time. But gosh darn it I'm determined to keep it up. Why? Because when I don't I go back to biting my nails. This blog and responsibilities to other makers and brands are the only thing holding me accountable. To make a long story short, we had Hurricane Irma come through this area, and that was incredibly stressful, and then Hurricane Maria devastated Puerto Rico (and if you don't know, that's where I'm from), and that was even more stressful and heartbreaking a whole lot of things. The end result was that I started to pick at my skin and bite my nails. So that's where we are right now, trying to grow them back again. In the meantime, here's some cool polish.

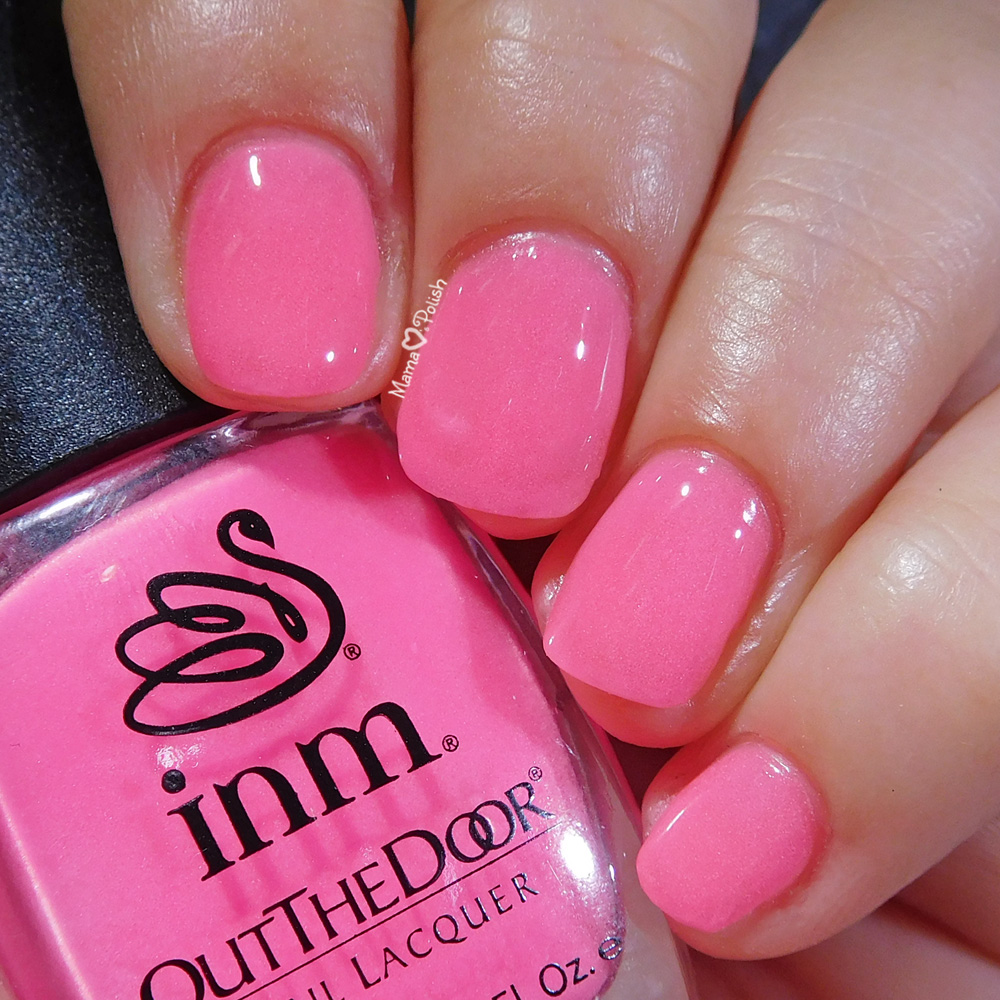
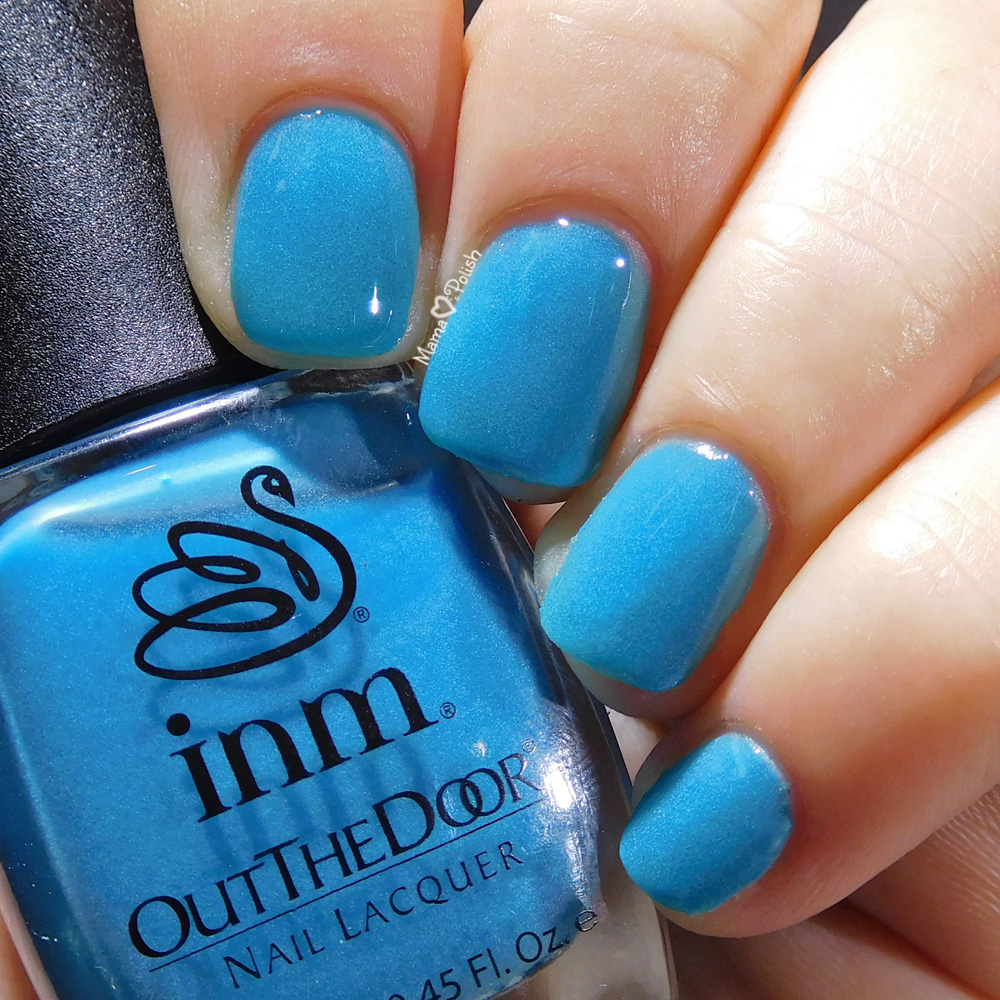
INM sent me their latest collection, Glow in the Dark, which is simply a a set of 5 glow in the dark neon polishes. I'm not an expert at getting glow in the dark shots so I was pleasantly surprised with the amount of glow my camera was able to capture for these, although some glow more than others. For the most part, they have a thin jelly formula that needs 3 coats to be somewhat opaque. Overall, I recommend using a white or similarly colored nail polish as a base layer and then applying a coat of these for the glow. They work best as a special effect topper kind of thing. Keep in mind that my nails are super short so anyone with longer nails would probably have a more noticeable free edge aka visible nail line. One last thing, some of these had some pigment settling in the bottom (similar to UBS but not with white), but a good shake mixes it back up easily and you're good to go.

Angler

inm-angler-swatch

inm-angler-glow-swatch

Up first is Angler, a sky blue glow in the dark crelly polish. Swatch is 3 coats with INM Curiosity top coat. This one was the most opaque and had one of the strongest glows. It glows a bright green.

Firefly
inm-firefly-swatch

inm-firefly-glow-swatch

Firefly is a pale yellow jelly polish. Swatch is 3 coats with INM Curiosity topcoat. Firefly had the strongest glow, a super bright green. This is what I would consider a typical glow in the dark polish or topcoat of sorts. It's very thin but it has a very intense glow effect.

Foxfire

inm-foxfire-swatch

inm-foxfire-glow-swatch

Foxfire is a super bright neon green jelly. Swatch is 3 coats with INM Curiosity topcoat. Foxfire also had a pretty strong green glow, although my camera didn't capture it as well.

Glow


inm-glow-swatchinm-glow-glow-in-the-dark-swatch

Glow is a coral neon jelly. Swatch is 3 coats with INM Curiosity topcoat. I really like the color but it had the weakest glow of them all. I had to edit the dark shot in Photoshop to get some of the glow to even show up.

Jelly

inm-jelly-swatch

inm-jelly-glow-swatch

Jelly is a super bright neon pink jelly. Swatch is 3 coats with INM Curiosity topcoat. It has a bright orange glow, much brighter than my camera captured.


Out of all of these my favorite was Angler, it's a pretty blue color and not something one would expect to have such a bright glow in the dark effect. These are available right now for $3 at www.inmnails.com. You can find INM on social media on Instagram and Facebook and with the hashtags #inmnails and #inm.

BBP - Polish Con Exclusive - For the Curious

Wednesday, September 6, 2017
Bad-Bitch-Polish-For-the-Curious-Polish-Con-Exclusive-swatch

*Press Sample* Hi guys! Today I have the Polish Con exclusive from Bad Bitch Polish called For the Curious. Swatch video and photos below!

Video Swatches


Photos

Bad-Bitch-Polish-For-the-Curious-Polish-led-lights
LED lights

Bad-Bitch-Polish-For-the-Curious-Polish-ottlite
Ottlite only

Bad-Bitch-Polish-For-the-Curious-Polish-ottlite-2
Ottlite

Bad-Bitch-Polish-For-the-Curious-Polish-macro
LED lights
 For the Curious is a beige-y/brown with a bit of a rose gold shimmer and intense linear holographic finish. It was inspired by the marble found in some of Chicago's libraries. Swatches are 2 coats with no top coat. Formula is flawless, super smooth and easy to work with. Check out the video above to see how it applied. No staining or issues to report. 1st 2 photos are in LED lights and the last 2 are with an Ottlite bulb. The macro is with the LED lights. This polish is truly something special, I also love the iridescent color shifting label on this bottle, makes it feel even more special. It will be available exclusively during the Polish Con event on September 23rd in Chicago for $15. There's a limit of 2 bottles per customer until 4 pm.

Make sure you're following BBP on Instagram, Facebook, and join the FB fan group for all the latest info and swatches!

I received this polish as a press samples in exchange for photos and an honest review. 

Indie Polish Review - BBP - September Duo

Thursday, August 31, 2017
Bad-Bitch-Polish-September-Duo-Swatches-Review

*Press Samples* Today I have the September Duo from Bad Bitch Polishes. For this month BBP has two gorgeous blue holo polishes, with slightly different finishes. Live swatch video is below, so you can see how great and easy they are to use, and photos after that.

Live Swatches

Swatches and Review

Blue Moon - described as a deep dark blue linear holo.

BBP-Blue-Moon-September-Duo-Swatch-1

BBP-Blue-Moon-September-Duo-Swatch-2

BBP-Blue-Moon-September-Duo-macro

Swatches are 1 coat with *no* top coat. Application was a breeze, super easy and perfectly opaque. Not too thick or thin, doesn't run, stays exactly where you put it. I mean, Britt from Bad Bitch Polish has been doing this for a while and her formula is pretty much perfect. I did have slight staining on my skin from clean up and removal but not on my nails, but that is to be expected with very saturated blues. My recommendation, use a good base coat and some type of liquid latex around your cuticles to make it easier.

Blue My Mind - described as a sapphire blue jelly with holo glitters and a slight linear holo effect.

BBP-Blue-My-Mind-September-Duo-Swatch-1

BBP-Blue-My-Mind-September-Duo-Swatch-1

BBP-Blue-My-Mind-September-Duo-macro

Swatches are 2 coats with 1 coat of Pretty and Polished Swift Sparkle top coat. I would describe the holo in this as more scattered, or at the very least more sparse. It does look a bit linear but it's no where as strong a Blue Moon. My lights to capture the holo better kinda obscured the glitters a bit but this polish is a gorgeous squishy blue jelly while at the same time being nicely pigmented that you only need 2 coats. You can check the video above for an accurate view at how it applies and looks. It's also easy to work with and while it does dry to a shiny finish, I added top coat to smooth it out some more. There are no glitters sticking out or anything like that but I did have some staining just like with Blue Moon.

If you like these and want to get your hands on them, they will be available September 1st at www.badbitchpolish.com. They will be $10 each or $19 for the duo. Make sure you're following BBP on Instagram, Facebook, and join the FB fan group for all the latest info and swatches!

I received these as press samples in exchange for photos and an honest review. 


Ipsy Glam Bag - July 2017

Sunday, August 13, 2017
ispy-july-2017-gudetama-bag

Today's post is about the Ipsy bag I got for July 2017. I know...I'm super late with this, I'm a busy woman ok? I actually got the August bag yesterday, so I hope to have that up soon. The products I received in my bag for July where TreStiQue mini concealer, 2 masks from TONYMOLY (I'm not sure I wrote that right), Ciate London Gel-Khol Hybrid liner, Hempz Ultra Moisturizing Herbal Lip Balm, and the Tarte Cosmetics Amazonian Clay Waterproof Bronzer. I haven't tested out the masks yet cause of something that happened to my face which I'm not sure you guys even want to know about...cause it was disgusting and disturbing...but uhh..don't pop your pimples ok? They can get a nasty staph infection...let's leave it a that. But I did try the other products as soon as they arrived and I have pics and my thoughts below!

The bag

ipsy-july-gudetama-bag

While this was one of the nicest bags I've gotten, in terms of construction and feel of the material, I am not a fan. I didn't find it cute. I know I'm in the minority, oh well.

TreStiQue Mini Concealer

trestique-mini-concealer-bisque

trestique-mini-concealer-bisque-before-after

I got the TreStiQue mini concealer in Bisque and I actually liked it a lot. It did cover up my awful purply undereyes (thanks genetics and allergies!). It didn't look like super amazing but the result was natural looking and I actually resembled someone who is nicely rested and healthy instead of the chronic health mess I am sometimes.

Ciate London Wonderwand Gel-Khol Hybrid Liner

Ciate-Wonderwand-gel-khol-hybrid-eyeliner

Ciate-Wonderwand-gel-khol-hybrid-eyeliner-black

In regards to the Ciate London Wonderwand Gel-Khol Liner in black I have mixed feelings. On one hand, it's a great product and I loved the brush at the opposite end. The formula applied nice and creamy, and the brush really helped to get that small perfect little kitty-eye wing style that I like. However, it wasn't black enough! It looked grayish, almost a green-gray on my skintone. I need a deep inky black!

Hempz Ultra Moisturizing Herbal Lip Balm

Hempz-Ultra-Moisturizing-Herbal-Lip-Balm

Hempz-Ultra-Moisturizing-Herbal-Lip-Balm-before-after

I loved this product! It was amazing. I know it can be hard to tell in the before and after pics above but trust me, my lips felt so much better and smoother. It has a nice citrusy taste as well. I will definitely be back for more of this.

Tarte Cosmetics Amazonian Clay Waterproof Bronzer

tarte-cosmetics-waterproof-bronzer-park-ave-princess

tarte-cosmetics-waterproof-bronzer-park-ave-princess-2

I love the Tart eyeshadow palette I own (Tartiest Pro or something like that, yeah I know..shame on me, bad blogger.). But I was a bit disappointed with this. Maybe the color just doesn't work for my skin tone? It's too reddish I think.


It looks great outdoors and using my phone's selfie camera but indoors my whole face looked like super crazy orange tan. I applied it like they did in the little video in the Ipsy website, contour, temples, jawline. I think it's just too much for someone who's already tanned. I've been using it sparingly, like blush, when I just want a simple makeup look, and it looks a bit better that way. I'm just not convinced about the color.

So that's it for the June Ipsy Glam Bag! Let me know what you thought? If you subscribe to Ipsy, did you love the products you got? Hated them? Leave a comment below!

Easy Fandom Nail Art - Hufflepuff Pride! - Moonflower Polish and MoYou London

Thursday, August 3, 2017
Hufflepuff-Pride-Nail-Art-Moonflower-Polish-Clear-Stamper-MoYou-London

Today's post is about one of my favorite fandoms, Harry Potter, using products from Moonflower Polish, MoYou London, and Lantern & Wren! I've been re-reading the books this past few months and when the fandom theme came up in the All About That Stamp group on Facebook, I decided that Hufflepuff nails was the way to go. When I 1st read the series, I thought for sure I would be a Ravenclaw, since I was all about creativity and intelligence. But now in my 30s, I realize my most defining traits are probably kindness and gentleness, so Hufflepuff it is. I also sorta feel it's a house no one wants to belong to, like they are the lame kids, the shy kids, just sitting alone all socially awkward...that's me too.

Hufflepuff-Pride-Nail-Art-Moonflower-Polish-Amarillo

So after thinking about it for days, I decided the easiest thing to do would be to a plaid scarf pattern in the house colors of black and yellow, with a bit of gray. I started with a base of Moonflower Polish Amarillo, pictured above in 2 coats with top coat. Now, it is a stamping polish so it's thicker than regular polish and it *will* stain your nails, so if you do use it as regular polish, proceed with caution.

Hufflepuff-Pride-Nail-Art-Moonflower-Polish-Gris
Hufflepuff-Pride-Nail-Art-Moonflower-Polish-Noche
Hufflepuff-Pride-Nail-Art-Moonflower-Polish-MoYou-London-Hipster 06-macro

For the stamping, I used MoYou London's Hipster 06 plate, with Moonflower Polish Gris and Noche, and the Big Blue Stamper from Lantern & Wren. To be honest, I'm not in love with the final look. I should have stopped with the gray and then black but I thought they where missing something and went back with the black a 3rd time, for a triple stamped look. I think it ended up looking messy afterwards but there was no going back. I need to remember my own mantra of "keep it simple" and "less is more".

Moonflower Polish is my own brand of 5 free, vegan, cruelty free, handcrafted stamping polish. You can purchase them at www.moonflowerpolish.com. Gris and Noche, as well as the stamper I used and a selection of MoYou London products are available at www.lanternandwren.com. Find Moonflower Polish on IG @moonflowerpolish (and don't forget to use #moonflowerpolish so I can repost your pics). On FB: @moonflowerpolish and the fan group Painted Moonflowers.

All the products featured where either made by me or purchased by me and I have not been compensated in any way for this post.

DIY Unicorn Hair Tutorial

Tuesday, August 1, 2017
DYI-Unicorn-Hair-Tutorial

In today's post, I'm going to show you how I do my current unicorn/galaxy/peacock inspired hair. It's actually really easy as long as you're already familiar with dyeing your own hair. For this look, I used products from Ion Color Brilliance and Arctic Fox hair color that I purchased myself.


You need to start with very light blonde hair, as pale as you can get it. Otherwise the purple won't be that will visible and will fade faster. I wanted a sorta violet shade so I mixed equal parts of Ion Color Brilliance Brights hair dye from Sallys in the colors Magenta and Purple. I used an empty tub and also added some conditioner, to dilute the color and make it easier to apply. The Ion hair dye tends to be more of a paste and adding conditioner makes it smoother. For the blue (not pictured cause I forgot), I mixed Arctic Fox Aquamarine and Poseidon (which I reviewed here).


Awkard angles with a double chin...yeah. I mean, I'm 33 and I have 2 kids, there's some curves everywhere, plus I've always had a short neck and rounded cheeks, even when I was 100lbs and 18. Anyway, you're going to want to  divide your hair mainly into two sections, the top is purple and the bottom blue. It helps if you're hair is cut into layers, otherwise you might not see the different colors that well. I did 6 sections to help me color the front.


Leave that in for an hour or so, wash it off in cold water, make sure you follow up with a deep conditioning treatment, style and ta-da! Unicorn, galaxy, whatever hair!

I think the whole process took about 2 hours and cost me way less than a trip to the salon. Plus I can touch it up as needed since I have plenty of dye left over. Since I originally did this in June, I can now tell you that it lasted about 2 weeks before the purple faded to a light reddish-violet. The blue lasts longer and that faded to a silvery blue in about 4 weeks, at which point I redid the whole thing. This time around, I didn't get any Overtone conditioners to match the purple/violet because I'd have to buy a free different tubs to match the color and that's more than I can spend right now. It's more cost effective for me to mix up the dye with some of my own conditioner and re-do the color that way. It's not as good as Overtone, but it works. And next time, I'll show you how I do that.

Custom Post Signature

Custom Post  Signature